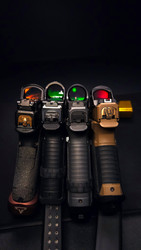
Glock Optic Mounting Problems
Posted by The Better Optic on Sep 28th 2026
Glock Optic Mounting Problems
Wrong screws, loose plates, extractor-plunger interference, footprint confusion, stripped threads, zero shift, torque problems, MOS vs. MOS-K vs. Gen6, and the dumb little mounting mistakes that can make a perfectly good Glock act broken.
IronKells Armory | Glock | Optics & Mounting
Mounting a red dot looks stupid simple.
Two screws. Tighten them. Zero the dot. Go shoot.
Until the gun starts throwing brass weird, failing to extract, stopping short of battery, losing zero, snapping screws or launching the optic loose after a couple hundred rounds.
We've already seen enough Glock optic setups to know that most mounting problems aren't some mysterious electronics failure.
They're usually fitment.
Wrong plate. Wrong screw. Wrong screw length. Wrong torque. Dirt under the optic. Plate not sitting flat. Hardware loosening. Or somebody assuming every Glock marked “MOS” uses the same damn mounting system.
Get the mechanical connection right first. Then worry about the dot.
“If the gun ran before the optic went on, start by looking at the damn optic installation.”
The Fast Summary
Don't automatically use the screws that came with the optic. The correct screw depends on the optic, plate, slide cut and how much thread can safely protrude.
Right-side screw problems are real. On applicable Glock setups, an overly long right screw can interfere with the extractor depressor-plunger system and cause extraction or cycling problems.
The plate needs to sit flat. Dirt, coating buildup, burrs or the wrong plate can leave the optic rocking even when the screws feel tight.
Torque is not universal. The plate-to-slide torque and optic-to-plate torque may be different, and different optic makers publish different values.
Use removable threadlocker when the system calls for it. Permanent red threadlocker isn't our default answer to screws coming loose.
Witness-mark the hardware. A tiny paint line can tell you whether a screw moved before your zero disappears.
First: Know Which Glock Optic System You Actually Have
“Glock MOS” isn't specific enough anymore.
| System | How It Works |
|---|---|
| Gen4 / Gen5 Standard MOS | Slide cut uses an adapter plate between the slide and optic for most common footprints. |
| Slimline MOS | Direct-cut slimline system based around the RMSc-style footprint and M4 hardware. |
| Slimline MOS-K | Modified slimline cut that accepts Holosun K- and RMSc-family optics without an adapter plate and uses M3 optic screws. |
| A-CUT | Aimpoint COA-specific factory interface using a dovetail / wedge-style mounting system instead of conventional screws passing through the optic body. |
| Gen6 Optic Ready System | New three-plate system where supported optics fasten through the plate directly into the slide using the specified hardware. |
| Direct-Milled Aftermarket Slide | Slide is machined for a specific footprint. Screw size, thread depth and bosses depend on the slide maker. |
Before buying plates or screws, figure out which one you actually own.
1. Footprint Isn't Just the Shape of the Bottom
When somebody says an optic is “RMR footprint” or “K footprint,” they're talking about more than where two screw holes are located.
The interface can include:
- Screw spacing
- Screw thread size
- Front or rear recoil bosses
- Boss height
- Optic-body clearance
- Plate thickness
- Available screw depth
Two optics can look damn near identical underneath and still need different plates or screw lengths.
Don't eyeball footprint compatibility.
2. The Screws in the Optic Box Are Not Automatically the Right Screws
This is probably the most common stupid mistake in pistol optics.
The optic manufacturer has no way of knowing every slide and plate you're going to mount the optic on.
So the hardware in the box may be:
- Too long
- Too short
- Wrong thread pitch
- Correct for a direct-milled slide but wrong for a plate
- Correct for one plate maker and wrong for another
Use the hardware specified for the entire mounting combination — not just the optic.
Optic + plate + slide all matter.
3. The Right-Side Screw Can Screw With the Extractor
This one deserves its own damn section because people chase it for hours.
On applicable Glock slide cuts, the right optic screw sits above or near the extractor depressor-plunger channel.
If that screw is too long, it can protrude into the channel and interfere with the extractor system.
The gun may then start showing:
- Failures to extract
- Weird ejection
- Failure to feed
- Failure to return to battery
- Extractor that feels bound or won't move normally
If the gun ran perfectly before the optic was mounted and immediately started having extraction problems afterward, this is one of the first things we'd check.
Don't rebuild the extractor system before checking the damn screw.
MOS-K has a hard number worth remembering: Glock warns that an optic screw protruding more than 4 mm below the bottom of the optic can damage the pistol and/or cause a malfunction. [S2]
4. Too Short Is a Problem Too
Everybody talks about screws being too long.
Too short can be just as stupid.
If the screw only catches a couple threads, you may get:
- Loose optic
- Zero shift
- Damaged threads
- Screws backing out
- Sheared hardware
You want useful thread engagement without the screw bottoming out or interfering with anything underneath.
5. The Plate Needs to Sit Flat
Before the optic even goes on, the plate should sit flat and solid against the slide.
Look for:
- Dirt under the plate
- Cerakote or finish buildup
- Burrs
- Bent or distorted plate
- Wrong plate
- Recoil bosses not matching the optic
If you can rock the plate before the screws go in, tightening harder isn't fixing the actual problem.
A screw shouldn't be used as a clamp to force a bad fit flat.
6. The Optic Shouldn't Be Depending on Two Tiny Screws for Everything
A good mounting interface usually has some kind of mechanical support besides the screws alone.
That may be:
- Recoil bosses
- Front or rear pocket engagement
- A tight direct-milled pocket
- A wedge or dovetail interface
The less movement the interface allows under recoil, the less abuse the screws have to take.
If the optic has obvious fore-and-aft slop on the plate before tightening, that's not the kind of fit we love.
7. Stop Using One Torque Number for Every Screw on the Gun
Plate-to-slide torque and optic-to-plate torque are not automatically the same.
Different manufacturers also publish different numbers.
For example:
| Mounting Point | Published Example |
|---|---|
| Glock standard MOS adapter plate → slide | Glock lists about 1.5 Nm / 13.3 in-lb for its plate screws. [S1] |
| Holosun optic → compatible slide / plate | Several Holosun pistol-optic manuals specify 15 in-lb with medium non-permanent threadlocker. [S4] |
Those numbers are close.
That doesn't make them one universal standard.
Use the torque specified for the exact hardware you're tightening.
Use a Damn Torque Driver
You can absolutely install a dot with a little Torx key and feel.
We've done it.
A torque driver is still better.
Especially when you're doing customer guns or repeatedly mounting optics.
Too loose:
- Hardware moves
- Zero shifts
- Screws eventually back out
Too tight:
- Stripped threads
- Damaged screw heads
- Distorted plate
- Broken hardware
Tiny screws don't need gorilla strength.
8. Threadlocker: More Isn't Better
A small screw doesn't need half a bottle of Loctite.
Most pistol-optic systems that call for threadlocker use a non-permanent / medium-strength product.
The threads also need to be clean enough for the product to actually work.
What we don't want:
- Oil-soaked threads
- Threadlocker dripping into the slide
- Permanent red compound used for no damn reason
- Old cured threadlocker stacked on top of old cured threadlocker
Clean the threads. Use the product the mounting instructions call for. Use enough — not enough to glue the whole pistol together.
9. Witness Marks Are Cheap Insurance
After the optic is mounted, put a small paint mark across the screw and optic or plate.
Now you have a visual reference.
If the lines stop matching:
Something moved.
That's easier to catch than waiting until your zero is six inches off and wondering what happened.
10. If Your Zero Keeps Moving, Check the Mount Before Blaming the Optic
Red dots can fail.
But a moving optic looks exactly like a bad optic from behind the gun.
Before assuming the electronics are screwed:
- Check witness marks
- Check optic screws
- Check plate screws
- Check for plate movement
- Check for cracked or distorted mounting hardware
- Check whether the optic is actually seated against the recoil bosses
Mechanical problems are cheaper to rule out than immediately replacing the dot.
11. Stripped Threads & Rounded Screws
Tiny optic screws are easy to fuck up.
Common causes:
- Wrong Torx / hex bit
- Cheap soft hardware
- Over-torque
- Cross-threading
- Permanent threadlocker
- Trying to remove threadlocked screws with a half-rounded bit
If the screw starts feeling wrong while threading in:
Stop.
A stripped slide is a hell of a lot more annoying than getting the correct screw.
Standard Gen4 / Gen5 MOS
The traditional full-size Glock MOS system uses an adapter plate between the slide and the optic.
The plate itself gets attached to the slide.
Then the optic attaches to the plate.
That means you now have two separate mechanical interfaces that can create problems:
- Plate → slide
- Optic → plate
Don't only check the optic screws if the dot starts moving.
The plate can loosen underneath it.
Slimline MOS vs. MOS-K
This is another area where the name “MOS” causes confusion.
Current Glock information separates:
Standard Slimline MOS: RMSc-family cut using M4 screws.
Slimline MOS-K: revised direct-mount cut that accepts Holosun K or RMSc-family optics and uses M3 optic screws.
The cover-plate screws are not optic screws.
Know which slide you have before ordering hardware or plates.
Gen6: Stop Treating It Like Old MOS
Gen6 standard-frame Glocks use Glock's new Optic Ready System.
It uses three numbered plates for supported optic families.
Current Glock compatibility includes optics such as:
- Trijicon RMR / RCR / RMR HD / SRO
- Holosun 407C / 507C / 507Comp / 508T
- C-More
- Vortex Defender ST / XL
- EOTech EFLX
- Leupold DeltaPoint Pro
Glock specifies which plate and which hardware go with each supported optic.
Don't drag old MOS assumptions into Gen6 and wonder why things don't line up.
A-CUT Is a Different Animal
The Aimpoint COA / Glock A-CUT setup doesn't mount like a normal RMR-style optic.
The interface uses a full-length dovetail-style relationship with a front hook and rear wedge to mechanically stabilize the optic.
No normal pair of mounting screws passes down through the optic housing the way most pistol dots work.
That's another reminder that “red dot on Glock” now covers several completely different mounting systems.
Aftermarket Plates Can Be Worth It
We've got no problem using a quality aftermarket plate.
A good plate can improve:
- Fit around the optic body
- Recoil-lug engagement
- Overall optic height
- Available optic choices
- Screw engagement
But aftermarket also means one more company gets to decide screw dimensions and tolerances.
Use that plate maker's hardware guidance instead of assuming Glock's or the optic maker's screws are automatically right.
Zero It After the Hardware Proves Itself
Once the optic is mounted:
- Function-check the pistol.
- Confirm extractor movement if the mounting location can affect it.
- Confirm nothing is visibly moving.
- Shoot enough rounds to settle the setup.
- Check witness marks.
- Confirm hardware is still secure.
- Then verify final zero.
Don't spend all afternoon chasing a perfect zero on an optic that's slowly unscrewing itself from the pistol.
Our Optic-Mounting Check Order
- Identify the exact Glock optic system.
- Confirm the optic footprint.
- Confirm the correct plate or direct-mount interface.
- Clean the slide, plate and screw threads.
- Make sure the plate sits flat without being forced.
- Confirm screw thread and length before tightening.
- Check right-side screw clearance where applicable.
- Use the correct torque for each mounting interface.
- Use the specified removable threadlocker.
- Add witness marks.
- Function-check before live fire.
- Confirm zero and hardware after shooting.
Quick Troubleshooting Chart
| What Happened | Where We'd Look First |
|---|---|
| Gun started failing to extract after optic install | Right-side screw length / extractor-plunger interference |
| Zero keeps wandering | Loose optic, loose plate, bad plate fit, damaged hardware |
| Optic visibly rocks before tightening | Wrong footprint / wrong plate / poor fit |
| Plate doesn't sit flat | Dirt, burr, coating buildup, wrong plate, damaged plate |
| Screws keep backing out | Torque, threadlocker, dirty/oily threads, poor screw engagement |
| Screw bottoms before optic is tight | Screw too long |
| Only a couple threads engage | Screw too short |
| Worked before optic, stops short of battery now | Screw interference, extractor drag, plate/hardware fit |
Common Glock Optic-Mounting Questions
Can an optic screw really make a Glock malfunction?
Yes. An overly long screw can interfere with internal slide components on applicable mounting systems. The extractor depressor-plunger issue is one of the best-known examples.
Should I use the screws that came with my Holosun?
Only if those screws are correct for your exact slide or adapter plate. The optic box doesn't know which plate you're using.
How tight should Glock MOS screws be?
For Glock's standard MOS adapter-plate screws, Glock publishes approximately 13.3 in-lb. Your optic-to-plate screws may use a different torque.
How tight should a Holosun be?
Several Holosun pistol-optic manuals specify 15 in-lb for slide mounting with medium, non-permanent threadlocker. Always use the instructions for the exact optic and mounting system.
Should I use red Loctite?
Not as our default. Most pistol-optic installations that call for threadlocker specify a removable or medium-strength product.
Does G43X MOS use a plate for a Holosun K optic?
It depends which slimline cut you actually have. Standard Slimline MOS and MOS-K are not identical. MOS-K was specifically revised to accept Holosun K / RMSc-family optics directly.
Is Gen6 still regular MOS?
No. Gen6 standard-frame pistols use Glock's newer three-plate Optic Ready System.
Related Forge Files
Glock Failure to Return to Battery
For slides that start stopping short after optic, barrel or other modifications.
Glock Failure to Feed
Feeding problems that may show up after extractor movement or cycling is affected.
Glock Compatibility Guide
Gen4, Gen5, Gen6, Slimline and optic-system differences.
Glock MOS & Optic Footprints
A deeper reference for RMR, K, RMSc, DPP, ACRO and other footprint families.
Bottom Line
Mounting a dot isn't complicated.
Doing it wrong is.
Know the cut.
Know the plate.
Know the screw.
Know the torque.
Check clearance.
Witness-mark it.
Then shoot the shit out of it and make sure the mount stays exactly where you put it.
Mount It Once. Mount It Right.
The red dot should help the pistol — not become the reason it stopped running.
Glock Forge Files Shop GlockSource List / Receipts
This guide combines hands-on Glock optic setup experience, common armorer and builder troubleshooting, and current manufacturer mounting information.
| ID | Source | Used For |
|---|---|---|
| S1 | GLOCK MOS Adapter Plate Instructions | Standard MOS plate types, screw specification, threadlocker and approximately 13.3 in-lb plate torque |
| S2 | GLOCK Slimline MOS-K Instructions | M3 optic screws and 4 mm maximum screw protrusion warning |
| S3 | GLOCK Optic Mounting / Gen6 Optic Ready System | Standard MOS, Slimline MOS, MOS-K, A-CUT and Gen6 three-plate compatibility |
| S4 | Holosun Pistol Optic Manuals | 15 in-lb slide-mount examples, medium threadlocker and clearance verification |
| S5 | Aimpoint COA / A-CUT Information | A-CUT dovetail, front-hook and rear-wedge mounting architecture |
| S6 | Builder / Armorer Experience | Right-side screw interference, plate fit, witness marks, loose hardware, stripped screws and zero-shift troubleshooting |
IRONKELLS ARMORY | FORGE FILES
Receipts Over Rumors.
Fit it. Torque it. Mark it. Shoot it. Make the mount prove itself.